


How to grow Artemisia
Artemisia is a popular garden plant grown for its attractive, aromatic silvery grey leaves, and tolerance of dry, sunny sites. Although a member of the daisy family its flowers are unshowy and generally of little interest; it is the foliage that is the main attraction for this plant.
Artemisia tends to grow quickly and without fuss, often reaching full size within one growing season. Depending on the species, common names include wormwood, mugwort, sagebrush, absinthe, and southernwood.
There are over 300 species, including annuals, perennials, and shrubs; some evergreen, others deciduous. Those grown in UK gardens tend to be perennial or shrubby and usually evergreen or semi-evergreen, with sizes and habits varying considerably. A. arborescens ‘Powis Castle’ is perhaps the best known, grown for its large, billowing clumps of feathery foliage. A. ludoviciana ‘Silver Queen’ is another favourite, with slightly chunkier leaves and a fast-spreading, rhizomatous habit which sees it popping up enthusiastically amongst neighbouring plants. A. schmidtiana ‘Nana’ is a dinky little cultivar; its soft, fine foliage forming low cushions good for edges and pots, with a slightly larger version named ‘Silver Mound’. Another species, A. dracunculus, is a widely used culinary herb better known as tarragon.

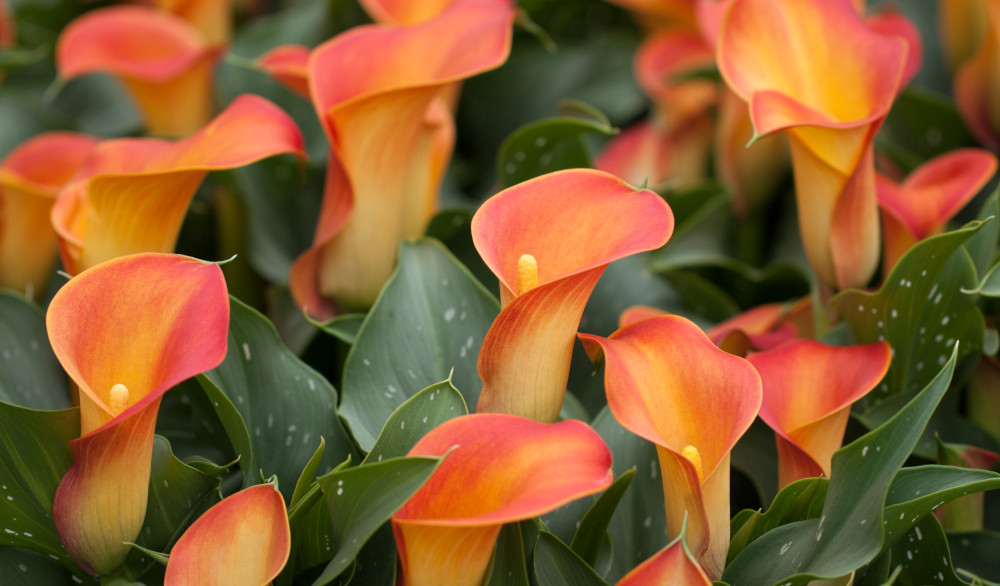
Zantedeschia is a genus of flowering plants from the family Araceae and is native to southern Africa. With a rich history dating back to the Ancient Romans, these deciduous or semi-evergreen perennials have been used as a symbol of celebration. Zantedeschia was Named after Professor Giovanni Zantedeschia, an Italian botanist.
There are two main forms of Zantedeschia: hardy and tender. Hardy forms of the plant can be grown outdoors, enjoy moist soil and full sun or partially shaded conditions - these are known as Arum lilies. Tender forms of Zantedeschia prefer being grown in containers or pots and should be brought inside over the winter - these are known as Calla lilies.
With tuberous flora in all colours from whites, yellows and oranges to deep reds and purples, Zantedeschias are not to be overlooked in any garden, as long as they have sufficient sunlight to grow in.
Ready to learn more about growing Zantedeschia? Read on for all there is to know...
Key Information
Soil pH

Position

Hardiness


Where & when to plant Artemisia
Key Information
Position - Full sun
Soil - With the exception of a few species such as A. lactiflora which prefer moist conditions, most artemisia need well-draining soil. They are likely to be short-lived when grown in heavy, poorly drained soil.
Flowering Period - Summer
Hardiness - Varies according to species, ranging from half-hardy (H3, 1 to -5°C) to fully hardy (H6, -15 to -20°C). Note that popular cultivar ‘Powis Castle’ is rated H3 and may not survive a harsh winter, especially once it has become aged and leggy. For this, we recommend maintaining stocks by regular propagation – see below for more information.
In the UK, artemisia is generally best planted in the spring so that it can become well-established before being faced with our cold, wet winters. Those living in a milder region (generally the southern half of the UK, or an urban or coastal location) may get away with an autumn planting, providing the soil is very well-draining. Planting can also be carried out in summer, though be prepared to water regularly.
Artemisia is well-suited to rock and gravel gardens along with well-draining borders. It can also make a wonderful, aromatic addition to container displays – particularly the smaller, non-spreading types such as ‘Nana’ or ‘Silver Mound’.
How to plant Artemisia
· For planting in the garden, dig the soil area removing any large stones and weeds and breaking up any lumps. Rake level and firm with your heels. Rake level again. Unless your soil is very poor there is no need to improve it at this stage. Artemisia isn’t a hungry plant, and excess nutrients can do more harm than good. An annual surface mulch will suffice.
· Water the plant well and allow it to drain before planting.
· Dig a hole twice the width of the root-ball.
· Place the plant in the hole, ensuring the top of the root ball sits level with the surface of the soil. Too low and the plant may rot, too high and the roots can dry out.
· Backfill with soil and firm in gently.
· Soak well with water.
· Mulch around the base with organic matter, such as manure or garden compost.
· For planting in a container, first choose an appropriately sized pot. You may wish to grow your artemisia on its own (in which case use one just a few centimetres larger than the nursery pot) or as part of a mixed container. Always ensure there are plenty of drainage holes in the bottom.
· Use a good quality compost with a little horticultural grit mixed in and, if not already present (check the labelling on the bag) some slow-release fertiliser granules.
· Start by partially filling the pot with compost; enough so that when placed on it the upper surface of the root balls is about 3 centimetres lower than the top of the pot.
· Fill around the plant with compost, firming down with your fingers then adding a little more so it is held tight.
· Pick up the container and lightly tap on the potting bench or ground a few times to help further settle the compost around the plant.
· Soak well with water.
· A mulch with horticultural grit will look attractive and help to prevent a ‘cap’ or crust forming on the top of the compost (something container plants can suffer due to the artificial nature of their watering).

What to plant with Artemisia
To exploit the superior drought resistance of artemisia, try using it as part of a dry garden in gravel or an area of parched earth. Similarly tough companions may include Stachys byzantina, echinops, eryngium, cistus, gaillardia, osteospermum, and delosperma.


How to care for Artemisia
Pruning and Deadheading
Perennial species can be cut to the base in autumn. If they’re prone to flopping open towards the end of the growing season, a midsummer shear can help prevent this.
Shrubby species are best cut back hard in spring, down to just above the lowest growing node. This helps maintain a neat, compact habit and avoids plants becoming leggy and ungainly.
Watering
Artemisia should be kept watered throughout its first growing season in the ground, after which it should be largely self-sufficient in all but the most prolonged periods of hot, dry weather.
Artemisia grown in a container will need watering regularly. This plant hates to sit in soggy conditions, so to avoid overdoing it a good rule of thumb is to water only once the top few centimetres of compost have dried out. Do be aware, however, that in the height of summer this can happen in as little as 24 hours, particularly with small or very full containers. From mid-autumn, the British climate tends to take over watering needs, though do remember to step in in the event of an unseasonably dry spell.
Feeding
On healthy, fertile soil, an annual mulch of well-rotted organic matter (i.e., a layer of manure or garden compost applied to the soil around the plant) should provide more than enough nutrients for your artemisia. This has the added benefit of suppressing weeds and locking in moisture, and is best done in autumn or spring.
For container-grown specimens, try to use a good quality compost with slow-release granules mixed in. This generally provides enough nutrients for six weeks, after which a monthly dose of balanced liquid feed will help maintain a healthy, thriving plant. It is also a good idea to get into the routine of repotting into fresh compost every couple of years, which will also provide the perfect opportunity to divide perennial species (see ‘How to propagate artemisia’ section below).
Cold Protection
Unless sitting in heavy, wet soil, most species of artemisia are hardy enough to withstand a UK winter without the need for additional protection. The exception to this is those rated H3, such as ‘Powis Castle’. These are likely to perish in a severe winter, and it is advisable to take cuttings each year as an insurance policy. Those grown in containers should be moved into a protected, frost-free environment such as a greenhouse, cold frame, or a well-lit porch or windowsill.
Pests and Diseases
The pungent essential oils found in artemisia foliage tend to keep most pests at bay, though ‘Powis Castle’ does seem oddly appealing to aphids. These are part of a balanced garden ecosystem, and where possible the best approach is to leave them to their natural predators (e.g. birds, ladybirds, wasps, frogs). When numbers are so large, however, that their feeding starts to inhibit and disfigure growth, you may feel it necessary to take action. Regularly blasting off with a hose or wiping away with a cloth or piece of kitchen paper can help to keep numbers down without harming other members of the ecosystem.
Artemisia tends to remain free of diseases.
How to propagate Artemisia
Perennial species are best propagated by division in autumn or spring. As well as providing new plants, this breathes new life into tired, congested clumps, and is recommended as a routine maintenance practice every 2-4 years:
· Choose a day when the soil is not frozen or waterlogged.
· Dig the plant out of the ground and shake off any excess soil.
· Separate into sections using either swift, cutting blows with a sharp spade, or two forks inserted back-to-back with tines touching, handles then pushed together to prise the plant apart.
· Discard old, damaged, or surplus pieces, keeping healthy, vigorous material with roots attached.
· Replant decent-sized pieces where desired, and any smaller bits can be potted up.
· Water well until fully established.
Shrubby species can be propagated by cuttings in early summer:
· Look for current year’s growth which is firm and woody at the base, while still soft and pliable at the tip. You’re aiming for a cutting of 10 centimetres or less (any longer and they are more likely to dry out and fail). For best results, choose stems where the leaf nodes are close together rather than far apart.
· Using a sharp knife or secateurs, sever the cutting from the plant and put in a plastic bag straight away.
· Fill a pot (or several, if you have a lot of cuttings) with a perlite-heavy compost mix (at least 50% perlite).
· Trim the end of the cutting to just below a node (point at which leaves grow).
· Remove lowest leaves and soft tip, leaving 2-4 leaves.
· If the remaining leaves are large, cut them in half with a sharp knife to reduce water lost through transpiration.
· Insert the cuttings into the compost and water lightly. Several cuttings can be put in the same container if there is enough space to do this without them touching.
· Place in a greenhouse or propagating unit if you have one, or covered with a plastic bag on a windowsill if not (out of direct sunlight).
· Keep the cuttings misted and occasionally watered until they root. You will know this has happened when roots emerge out of the bottom of the container.
· Gently remove rooted cuttings and pot them into individual pots. Grow on in a cool yet frost-free environment such as an unheated conservatory, greenhouse, or cold frame, until they are large enough to be potted or planted as above.
* Many plants carry Plant Breeders Rights and cannot be propagated for commercial purposes.
Common Artemisia Questions
Is artemisia invasive?
Artemisia ranges from extremely well-behaved to a bit of a thug, depending on the type. Some are clump forming and will not creep at all, while others have a spreading, rhizomatous habit. Of this latter group, the general rule is that named cultivars tend to be less rampant than straight species, so while something like, say ‘Silver Queen’ may make a moderate takeover bid, it is easily controlled with a once or twice a year digging out. Something like A. vulgaris however (the tall, UK native wildflower sometimes seen colonising roadsides and wastegrounds and also known as mugwort), is much more aggressive and notoriously difficult to eradicate.
My perennial artemisia is starting to die out in the middle. What should I do?
This is normal behaviour as the clump matures. Take it as your cue to lift and divide, as in our ‘How to propagate artemisia’ section above.
