


How to grow Gladiolus
Also known as gladioli, this cormous plant is grown for its showy spikes of funnel-shaped flowers which open from the bottom upwards. There are around 180 species, most of which are from South Africa and unable to withstand frost. These are perhaps the most familiar, having given rise to many thousands of large, colourful hybrids which are hugely popular with gardeners and florists alike. In the garden these summer-flowering plants can either be treated as annuals, or lifted and stored in much the same way as dahlias (see more on this below).
Then there are a few hardier, Mediterranean species which may be left in the ground to naturalise, chief among which is Gladiolus communis subsp. byzantinus. This species is native to Sicily, Spain, and NW Africa, where its spikes of hot magenta flowers appear in great swathes across fields and vineyards in late spring.
Both types of gladiolus can be grown with great success here in the UK, though their cultivation requirements differ. Read on to learn everything you need to know.

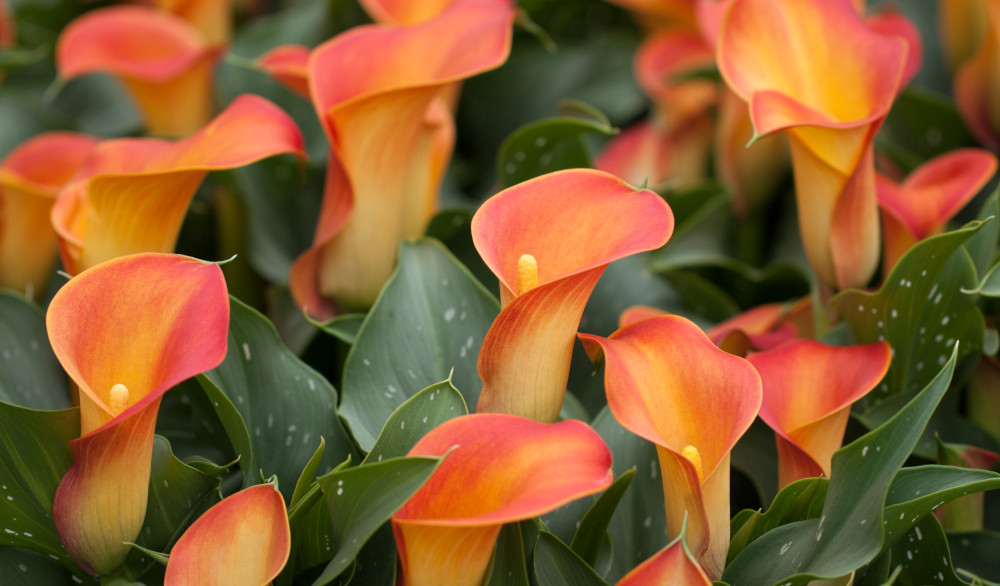
Zantedeschia is a genus of flowering plants from the family Araceae and is native to southern Africa. With a rich history dating back to the Ancient Romans, these deciduous or semi-evergreen perennials have been used as a symbol of celebration. Zantedeschia was Named after Professor Giovanni Zantedeschia, an Italian botanist.
There are two main forms of Zantedeschia: hardy and tender. Hardy forms of the plant can be grown outdoors, enjoy moist soil and full sun or partially shaded conditions - these are known as Arum lilies. Tender forms of Zantedeschia prefer being grown in containers or pots and should be brought inside over the winter - these are known as Calla lilies.
With tuberous flora in all colours from whites, yellows and oranges to deep reds and purples, Zantedeschias are not to be overlooked in any garden, as long as they have sufficient sunlight to grow in.
Ready to learn more about growing Zantedeschia? Read on for all there is to know...
Key Information
Soil pH

Position

Hardiness


Where & when to plant Gladiolus
Key Information
Position - Full sun. Don’t waste time and effort trying to grow these sun worshippers in shade.
Soil - Fertile and well-draining.
Flowering Period - Can be spring through to early autumn, depending on the species.
Hardiness - Varies according to species. Most of the non-hardy types are rated H3 (meaning a minimum temperature of 1 to -5°C). The hardier, Mediterranean types (e.g., G. communis subsp. byzantinus) are usually H5 (-10 to -15°C).
Non-hardy types can be treated in one of two ways. In mild regions (generally the southern half of the UK, or in coastal or urban areas), you can plant the dry corms straight into the ground in late April or early May. In colder areas, it may be safer to plant them in pots in late March/ early April and start them off into growth in a frost-free environment such as a greenhouse or coldframe. They can then be planted out into the garden in late May/ early June. Whichever method you use, expect flowers around 3 months after initial planting.
Hardy types can be planted into the ground in autumn, much like any spring-flowering corm or bulb.
In terms of choosing a spot, non-hardy types look at their best in drifts in a sunny, sheltered border (most will need staking in a windier spot). Another popular method is productive rows – gladiolus are excellent cut flowers without which no cutting garden is complete.
Hardy Mediterranean types do well at the base of a warm, south-facing wall. They can also naturalise in grass, though to give them the best chance at establishing in this environment we recommend planting during growth (having been started off in pots), rather than as dry, dormant corms.
Gladiolus will also grow quite happily in containers. Best results come from grouping several together in a pot – like all bulbs and corms they may be spaced more closely together in a pot than in the ground (see next section for more information).
How to plant Gladiolus
Hayloft tip
Plant your gladiolus in staggered batches to avoid having them all flower at once. Aim to do a batch every couple of weeks until July.
- For planting in the ground, first clear the chosen area of weeds. Dig over the soil, knocking out large lumps and removing any stones. Now is a good chance to improve the soil by mixing in some well-rotted organic matter such as manure or garden compost.
- Plant corms 10-15 centimetres deep, spaced approximately 10 centimetres apart. If you’re planting a row in a cutting garden, digging a trench will be quicker than individual planting holes.
- It can be a good idea to add a layer of sharp sand or grit to the bottom of the trench or planting holes, particularly if your soil is on the heavier side.
- Backfill with soil and firm in gently.
- Soak well with water.
- For planting in a container first choose an appropriately sized pot, remembering that the corms may be spaced more closely together here than in the ground. As a rough guide, five corms should fit comfortably in a 15 centimetre pot. Ensure there are plenty of drainage holes in the bottom.
· Partially fill the container with a good quality compost with a generous amount of horticultural grit added, then place the corm on top, aiming for a depth of around 10-15 centimetres.
· Fill the remainder of the container with compost, leaving a small gap of 2-3 centimetres between the surface of the compost and the top of the container.
· Pick up the container and lightly tap on the potting bench or ground a few times to help further settle the compost around the plant.
· Soak well with water.
· A mulch with horticultural grit will look attractive and help to prevent a ‘cap’ or crust forming on the top of the compost (something container plants can suffer due to the artificial nature of their watering).

What to plant with Gladiolus
Non-hardy types blend beautifully in borders and pots with other cottage garden favourites, including persicaria, geranium, digitalis, nepeta, euphorbia, and achillea.
Hardy Mediterranean types can be naturalised in areas of long grass, along with other colourfully flowered companions such as silene, leucanthemum, achillea, centaurea, scabious, digitalis, camassia, and Geranium pratense. Alternatively, put them in a sunny, well-draining border, where they look stunning contrasted against the acid-greens of euphorbia.


How to care for Gladiolus
As a cut flower, gladiolus lasts longest if each spike is cut just as its first buds begin to colour up.
Deadheading spent gladiolus flowers won’t mean a second bloom, though can be done to maintain a tidy appearance.
Whenever cutting a flower spike, it is important to leave as much foliage behind as possible to support healthy growth the following year.
Watering
Gladiolus tolerates short periods of drought, though will flower much better with consistent moisture. Give a good soak on initial planting, and then in any prolonged periods of hot, dry weather after this. To avoid overdoing it (like most corms and bulbs, gladiolus dislikes sitting in soggy soil), water only once the top few centimetres of soil have dried out.
Gladiolus in containers should be kept well-watered when in growth (May to September). Again, allowing the top few centimetres of compost to dry out is a good rule of thumb to prevent overwatering, though be aware that this can happen quickly during the height of summer and during very hot spells you may find yourself watering as often as once a day. Scale the watering back as the leaves wither, allowing the compost to dry out completely in winter (you’ll need to move the container somewhere covered).
Feeding
To get the maximum floral display from non-hardy gladiolus types, it pays to provide the corms with a dose of high potassium liquid feed. Tomato food is ideal and should be applied when the emerging spike reaches around 15 centimetres tall. For those grown in the ground this one application should suffice. For those in containers repeat every two to three weeks throughout the flowering season.
Hardy, Mediterranean types don’t require this treatment, though an annual mulch of well-rotted organic matter is a good idea for those in a border.
Cold Protection
Non-hardy gladiolus hail from South Africa and are not equipped to withstand a UK winter. As the corms are easy and relatively inexpensive to get hold of, many gardeners simply discard them at the end of the growing season and start afresh with new ones each year, though it is also possible to overwinter and reuse those you have. Traditionally, this has meant approaching them in much the same way as you would dahlia tubers. This means lifting the corms in autumn so they can be stored somewhere frost-free and dry over winter (a shed, garage, or greenhouse are all ideal):
· On earlier flowering types the foliage will have died back by this point, while on others it will still be green. Don’t worry about this – cut back to a stub of a few centimetres regardless.
· Carefully dig the corms out of the ground.
· Shake and then rinse off as much soil as possible. Remove and discard any small cormlets, unless you wish to keep these for propagation in which case follow our advice below.
· Spread out somewhere warm and dry for a few weeks to fully dry out.
· You’ll notice a new, plump corm has been produced on top of the old, now shrivelled one. Once dried, you should be able to separate the two by twisting and snapping them apart. Keep the new one, discard the old.
· Pack in a pot/ box/ crate with dry material such as compost, vermiculite, or newspaper, until ready to plant the following spring.
Where winters are mild, you may get away with leaving your gladiolus corms in the ground with a deep, dry mulch to protect against cold and wet. Bracken, straw, or bark chips are all good options; pile on in autumn and remove again in late spring. Be aware, however, that this is something of a gamble and success is by no means guaranteed!
An even lower-effort approach is available for gladiolus grown in pots. These can be simply cut back in autumn, moved to a frost-free environment, and allowed to dry out while remaining in the compost. Refresh the following spring by tipping the lot out onto a potting bench, separating the old and new corms as above, and potting into fresh compost.
Hardy types require none of this treatment and can be left in place all year round. If winters are very harsh where you are, put a nice thick mulch on your borders in autumn and insulate pots with bubble wrap, fleece, or hessian.
Pests and Diseases
You may notice things like aphids, thrips, and slugs having a go at gladiolus foliage and stems, and occasionally signs of grey mould or gladiolus corm rot too. Growing healthy, thriving plants is the first line of defence, which means:
· Planting in well-draining, not soggy conditions.
· Watering during drought until the plant is established.
· Practising good garden hygiene, i.e., collecting and removing fallen leaves and detritus from around the plant.
· Nourishing the soil with an annual mulch.
· Creating a balanced garden ecosystem by avoiding chemicals and encouraging a broad spectrum of wildlife.
· Providing sufficient water and nutrients to plants grown in containers.
How to propagate Gladiolus
The quickest way to produce new gladiolus plants is using the small cormlets which form around the main corm. Lift and separate these in autumn, store somewhere dry and frost-free over winter, then plant in a nursery bed or pot up in spring. Expect flowering plants within one to two years.
* Many plants carry Plant Breeders Rights and cannot be propagated for commercial purposes.
Common Gladiolus Questions
What month do you plant gladiolus bulbs?
Non-hardy types should be planted in spring. In mild areas where summers are long, the easiest thing to do is to plant them directly into the ground in late April/ early May. In the north where the growing season is shorter, start them off in pots indoors in late March/ early April, and wait until all risk of frost has passed before planting outside.
Hardy types can be planted in autumn along with your spring-flowering bulbs.
Do gladiolus come back every year?
It depends! Hardy types should come back every year with no additional effort on your part, while non-hardy types need a little help (see ‘Cold Protection’ above).
Are gladiolus easy to grow?
They’re pretty much a ‘stick them in and watch them go’ plant for the first growing season. Beyond this, keeping non-hardy types going takes a little know-how, though ripping them out each autumn and starting afresh each spring is an option for those in search of the easy life.
Can I leave non-hardy gladiolus bulbs in the ground?
If you have well-draining soil and mild winters it’s worth giving this approach a go. Increase your chances of success by giving them a protective winter mulch – see above.
My corms seem to have formed lots of little cormlets but no main, new corm. Why?
This can happen if the corm has been planted too shallowly. Next time, ensure a depth of at least 10-15 centimetres.
Does gladiolus need staking?
Hardy types and many of the shorter non-hardy types are sturdy enough to stand without support. Taller varieties may need some help, particularly if grown in a windy spot. Make a cage around each plant with canes and string, though take care not to damage the corm when pushing the canes into the soil. If you garden on light, sandy soil, it can be worth planting a little deeper to improve stability.
I’m a bit behind this year. What’s the latest I can plant out gladiolus?
Planting corms out any later than July is fruitless as they won’t have enough time to produce flowers before autumn.
