


How to grow Hemiboea
This little-known shade dwelling perennial comes from mountain forests in China and is one of our favourite secret-weapons for a dimly lit spot. The handsome, glossy foliage would be reason alone to grow this unusual plant, however it also has a late season surprise up its sleeve. Towards the end of autumn as most other perennials are retreating into dormancy, it erupts in foxglove-like flowers with delicately spotted throats, nestled on top of and between the leaves.
This relative of the African violet belongs to Gesneriaceae and is one of the hardiest plants in an otherwise largely tropical plant family. In its natural frost-free habitat it can spread vigorously (sending out stolons which root readily), though the UK climate tends to curb these inclinations to a gentler and more manageable level.
Hemiboea is also known by the common names of false sinningia and false gloxinia, a nod to two tender, houseplant members of the same family.
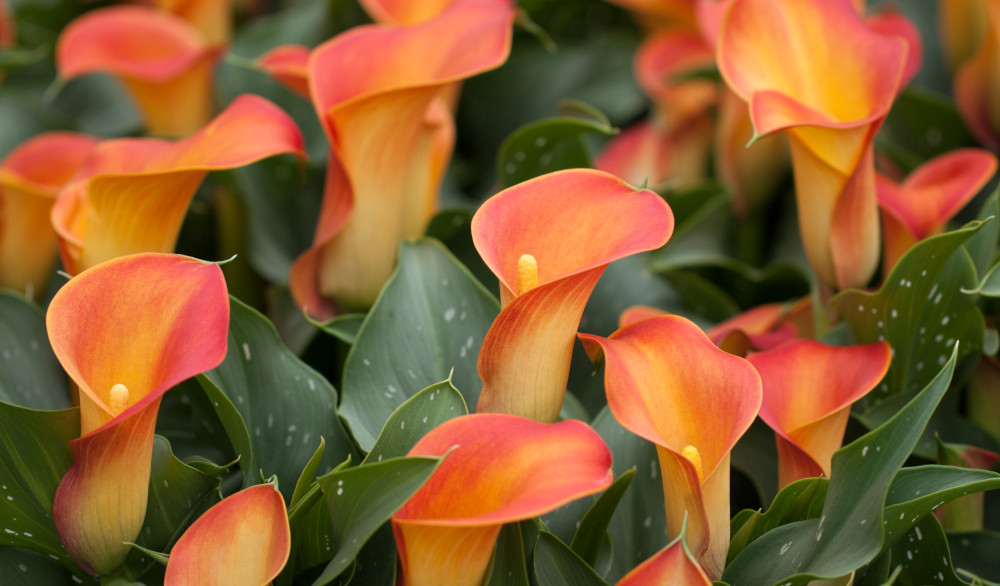
Zantedeschia is a genus of flowering plants from the family Araceae and is native to southern Africa. With a rich history dating back to the Ancient Romans, these deciduous or semi-evergreen perennials have been used as a symbol of celebration. Zantedeschia was Named after Professor Giovanni Zantedeschia, an Italian botanist.
There are two main forms of Zantedeschia: hardy and tender. Hardy forms of the plant can be grown outdoors, enjoy moist soil and full sun or partially shaded conditions - these are known as Arum lilies. Tender forms of Zantedeschia prefer being grown in containers or pots and should be brought inside over the winter - these are known as Calla lilies.
With tuberous flora in all colours from whites, yellows and oranges to deep reds and purples, Zantedeschias are not to be overlooked in any garden, as long as they have sufficient sunlight to grow in.
Ready to learn more about growing Zantedeschia? Read on for all there is to know...
Key Information
Soil pH

Position

Hardiness


Where & when to plant Hemiboea
Position - Partial shade
Soil - Slightly moist yet well-draining, ideally with a neutral to acidic pH.
Flowering Period - Late autumn
Hardiness - Half-hardy, rated H3 (1 to -5°C)
Hemiboea grows naturally in a warm, frost-free climate, and is best planted outside in the UK only once risk of a hard frost has passed. This varies from region to region, though tends to be mid to late May. If your plant arrives before it is safe to move it out, keep it in a protected environment such as a conservatory, greenhouse, or a sunny windowsill or porch until the time is right. Remember to water it during this time in a ‘holding zone’.
Gardeners in the milder, southern half of the UK or with a warm microclimate (perhaps in a coastal or urban location) may get away with growing hemiboea in the open ground in a warm, sheltered spot. The base of a wall, edge of a stream or pond, or woodland garden are all ideal. Just ensure the spot gets more shade than sun and isn’t prone to drying out during summer. Protective measures may be needed during winter (see ‘Cold Protection’ below).
In chillier spots and further north, it is better to grow hemiboea in a container to allow for overwintering indoors. It can even be kept indoors all year round as a permanent conservatory or greenhouse plant, where it will need plenty of brightness though no direct light during the summer months. Just be aware that this naturally spreading plant will quickly strain at the confines of a container, and is likely to need splitting and repotting each year.
How to grow Hemiboea
· For planting in the garden, dig the soil area removing any large stones and weeds and breaking up any lumps. Now is the time to improve the soil by incorporating some well-rotted organic matter. Manure, garden compost, or leaf mould are all ideal. Rake level and firm with your heels. Rake level again.
· Water your hemiboea well and allow it to drain before planting.
· Dig a hole twice the width of the root-ball.
· Place the plant in the hole, ensuring the top of the root ball sits level with the surface of the soil. Too low and the plant may rot, too high and the roots can dry out.
· Backfill with soil and firm in gently with your foot.
· Soak well with water.
· Mulch around the base with well-rotted organic matter.
· For planting in a container, first choose an appropriately sized pot. Hemiboea is a spreading, creeping plant so does best in an individual rather than mixed container. Choose one several centimetres larger than the nursery pot, ensuring there are plenty of drainage holes in the bottom.
· Using a good quality potting compost, start by partially filling the pot; enough so that when placed on it the upper surface of the root ball is about 3 centimetres lower than the top of the pot.
· Fill around the plant with compost, firming down with your fingers then adding a little more so it is held tight.
· Pick up the container and lightly tap on the potting bench or ground a few times to help further settle the compost around the plant.
· Soak well with water.
· A mulch with horticultural grit will look attractive and help to prevent a ‘cap’ or crust forming on the top of the compost (something container plants can suffer due to the artificial nature of their watering).
What to plant with Hemiboea
Nestle this jewel amongst other shade dwellers to create a dense, lush tapestry for a dimly lit spot. Think hosta, lamium, polemonium, brunnera, and Geranium phaeum, along with ferns such as blechnum and polystichum.


How to care for Hemiboea
Pruning and Deadheading
Hemiboea is usually semi-evergreen in a UK climate. We tend to leave it untouched through winter and give a bit of a spruce up in early spring, removing any dead or tatty foliage.
Watering
Hemiboea enjoys moist conditions and so, when grown outside, benefits from a good watering in on planting and then regular soakings until established. After this and providing it is grown in the right conditions with an annual mulch (more on this next), it should need watering only in prolonged periods of hot, dry weather.
Grown in a container, hemiboea can be watered freely throughout the growing season (roughly March to September), aiming for consistently moist but not soggy compost. Be aware that in hot weather, containers may need watering more often than you might think (particularly smaller containers or those kept indoors). As growth slows in autumn reduce watering to the bare minimum, i.e., just enough to prevent the compost drying out completely.
Feeding
On healthy, fertile soil, an annual mulch of well-rotted organic matter should provide sufficient nourishment for your hemiboea (manure , leaf mould, or garden compost are all ideal). As well as boosting the nutrient content of the soil, mulch has the added benefits of suppressing weeds and locking in moisture. Autumn and spring are the best times to do this.
In a container, try to use a good quality compost with slow-release granules mixed in. This generally provides enough nutrients for six weeks, after which a monthly dose of balanced liquid feed will help maintain a healthy, thriving plant.
Cold Protection
Where winters remain relatively mild, hemiboea can be grown outdoors in a sheltered spot and covered with a protective mulch of straw or layer of horticultural fleece over winter.
Otherwise, it is best grown a container so that it can be overwintered indoors in a cool yet frost-free environment. A conservatory, greenhouse, or porch are all perfect spots.
Pests and Diseases
Hemiboea is considered trouble free.
How to propagate Hemiboea
The quickest and easiest way to propagate hemiboea is to divide established clumps in spring:
1. Choose a day when the soil is not frozen or waterlogged.
2. Dig the plant out of the ground and shake off any excess soil.
3. Separate into sections using either swift, cutting blows with a sharp spade, or two forks inserted back-to-back with tines touching, handles then pushed together to prise the plant apart.
4. Discard old, damaged, or surplus pieces, keeping healthy, vigorous material with roots attached.
5. Replant decent-sized pieces where desired, and any smaller bits can be potted up.
6. Water well until fully established.
* Many plants carry Plant Breeders Rights and cannot be propagated for commercial purposes.
Common Hemiboea Questions
· How much does hemiboea spread?
In a warm, sheltered spot it can spread via stolons to create a largish clump of around 90 centimetres over two or three years. Touched by light frosts it is likely to remain more contained.