


How to grow Ipomoea
Commonly known as morning glory, there are many hundreds of species of this fast-growing plant found growing in warm regions across the world. Some are annual while others are perennial, though this is irrelevant in our chillier UK climate where winter kills them off after one growing season regardless. UK gardeners therefore largely know this plant as annual summer bedding, with Ipomoea purpurea and I. tricolor (also known as I. rubrocaerulea) the two most widely grown species. These are twining climbers with large, trumpet-shaped flowers, and include popular cultivars such as ‘Grandpa Otts’, ‘Heavenly Blue’, ‘Star of Yelta’, and ‘Crimson Rambler’.
Another well-known species is I. lobata (formerly Quamoclit lobata), known commonly as Spanish flag. Its long, curved racemes of red, orange, and creamy yellow tubular blooms are markedly different the flowers of other species, though it shares exactly the same growing requirements.
I. batatas is another species most UK gardeners will have heard of, though probably by its common name of sweet potato. To produce decent, edible tubers it needs temperatures to remain between 21 and 26°C and so is not widely cultivated as a crop here. It has, however, been bred from to produce compact ornamental cultivars for hanging baskets and containers, a prime example being the Solar Power series. These rarely flower and are grown mainly for their decorative foliage.
It is important to note that ipomoea is very tender (moreso than many other annual bedding plants) and will struggle in a poor summer or more exposed garden. For those whose garden doesn’t offer the warm, sheltered conditions needed, it may be best enjoyed as a greenhouse or conservatory plant.
A note here on bindweed. As the strong resemblance suggests, yes ipomoea is related to this common native weed, although they are separate genera (hedge bindweed is Calystegia and field bindweed Convallaria). In tropical and subtropical climates, Ipomoea can exhibit similarly invasive tactics to its dreaded relative, however our cold winters are enough to keep it in check here.

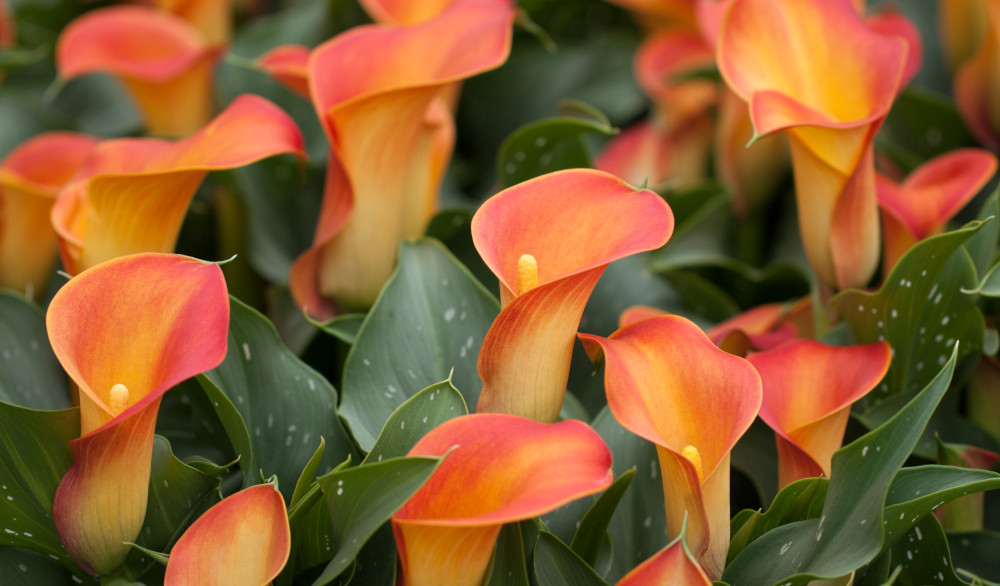
Zantedeschia is a genus of flowering plants from the family Araceae and is native to southern Africa. With a rich history dating back to the Ancient Romans, these deciduous or semi-evergreen perennials have been used as a symbol of celebration. Zantedeschia was Named after Professor Giovanni Zantedeschia, an Italian botanist.
There are two main forms of Zantedeschia: hardy and tender. Hardy forms of the plant can be grown outdoors, enjoy moist soil and full sun or partially shaded conditions - these are known as Arum lilies. Tender forms of Zantedeschia prefer being grown in containers or pots and should be brought inside over the winter - these are known as Calla lilies.
With tuberous flora in all colours from whites, yellows and oranges to deep reds and purples, Zantedeschias are not to be overlooked in any garden, as long as they have sufficient sunlight to grow in.
Ready to learn more about growing Zantedeschia? Read on for all there is to know...
Key Information
Soil pH

Position

Hardiness


Where & when to plant Ipomoea
Position - Outdoors: A sunny, sheltered spot (cold winds spell trouble for this plant). Indoors: full light with shade from the hottest midday sun.
Soil - Moderately fertile and well-draining
Compost - Good quality loam-based compost such as John Innes No 2 or 3
Flowering Period - All summer and into autumn
Hardiness - Tender, rated H1C (minimum temperature of between 5 and 10°C)
All our ipomoea are sent out as young 4 centimetre plug plants. These will need to be potted up and grown on indoors until the outside nighttime temperature remains above 8°C (June is usually a safe bet, though keep an eye on your thermometer and local forecast). A warm, well-lit greenhouse, conservatory, or windowsill are ideal spots for such a ‘holding zone’. Pot into 9 centimetre pots, unless your indoor spot is roomy enough to house the eventual display container or hanging basket, in which case get the young plants straight into that.
An important thing to note with tender plants like ipomoea is the need to gradually harden them off, rather than suddenly move them outside. This slow toughening up reduces the chances of them going into ‘shock’, which can severely check growth.
The easiest way to do this is by using a cold frame opened in gradual increments over the course of a week or two. Keep the lid closed at night until the last couple of days of the hardening off period.
If you don’t have a cold frame, a bit of horticultural fleece combined with a spot of ‘musical pots’ works just as well. A couple of weeks before you anticipate planting your ipomoea out, wrap the plants in a couple of layers of fleece and place outside during the day (moving back into a warm, protected environment at night). Do this for a few days then reduce the fleece to one layer. After a few more days like this, remove the fleece completely. If it’s warm enough you can leave outside at night too, though reapply the fleece for this. Towards the end of the hardening off period, leave your plants outside completely uncovered for a couple of days and nights before planting out as below. Although somewhat tedious this process is worth the effort to ensure your plants are a strong and healthy as they can be.
In terms of an eventual location, ipomoea likes plenty of sunshine and as little wind as possible, so perhaps a tucked away spot on a patio, in front of a sheltered, south-facing wall, or basking inside a walled garden or courtyard. Suitable indoor spots include bright, sunny conservatories, greenhouses, or porches, with shade netting installed to intercept the fierce, midday sun if necessary (this is amplified to harmful levels when it passes through glass).
Climbing types will need some form of support to scramble up, such as wires, a trellis, or a wigwam or obelisk. Trailing types can be left to spill out of a hanging basket, elevated container, or over the edge of a wall or raised bed.
How to plant Ipomoea
· To grow in a container, firstly choose the right pot. Climbing types are at their best grown several to a large container (i.e., three to five plants to a pot at least 30-40 centimetres across). Smaller, trailing types can be popped in amongst other bedding plants in hanging baskets and mixed containers. Always ensure there is plenty of drainage.
· Use a good quality loam-based potting compost with some slow-release feed mixed in. Sometimes these are already present in the compost, otherwise you will need to add your own (check the description on the bag).
· Start by partially filling the pot with compost; enough so that when placed on it the upper surface of the root balls are about 3 centimetres lower than the top of the pot.
· Infill all the space surrounding the root balls with compost, firming down with your fingers then adding a little more so the plant is held tight.
· Pick up the container and lightly tap a few times to help further settle the compost around the plants.
· Soak well with water.
· A mulch with horticultural grit will look attractive and help to prevent a ‘cap’ or crust forming on the top of the compost (something container plants can suffer due to the artificial nature of their watering).
· For planting in the garden, dig the soil area removing any large stones and weeds and breaking up any lumps. Now is the time to improve the soil by incorporating some well-rotted organic matter. Manure, garden compost, or leaf mould are all ideal. Rake level and firm with your heels. Rake level again.
· Dig a hole twice the width of the root-ball.
· Place the plant in the hole, ensuring the top of the root ball sits level with the surface of the soil. Too low and the plant may rot, too high and the roots can dry out.
· Backfill with soil and firm in gently.
· Soak well with water.
· Mulching is not essential, though will help lock water into the soil and minimise the need for watering later in the season.

What to plant with Ipomoea
Trailing, foliage types are perfect for pairing with other tender bedding plants for a riot of tropical colour in summer containers and hanging baskets. Think begonia, lobelia, impatiens, isotoma, petunia, and calibrachoa.
Climbing types look great in conjunction with other scrambling annuals, all providing a burst of height and colour in a gratifyingly short space of time. Sweet peas are the obvious choice, though we also love nasturtiums, thunbergia, and rhodochiton.


How to care for Ipomoea
Pruning and Deadheading
Ipomoea is a fantastically easy plant which requires no pruning or deadheading. At the end of the growing season, simply remove it to the compost heap.
Watering
Ipomoea is a vigorous, thirsty plant which can be watered freely during dry weather. Aim for consistently moist but not soggy soil/ compost.
A saucer placed under a container can be a great help in maintaining moisture in the compost, though even with this in place be aware that containers can need watering as often as once a day when conditions are hot (more if the container is very small or full). In the ground, a generous layer of mulch on planting is an effective way of locking water in the soil (see next section).
Feeding
To get the most out of hungry summer bedding plants such as ipomoea, regular feeding is a must – particularly when grown in containers.
In a container, use a good quality compost with slow-release fertiliser granules mixed in. These generally provide enough nutrients for around 6 weeks, after which a monthly application of liquid feed makes big difference to performance. Go for one high in potassium (such as tomato food) to encourage maximum flowering.
In the open ground, mulch newly planted ipomoea with a decent layer of well-rotted organic matter, i.e., manure or garden compost applied to the soil around the plant. As well as boosting the nutrient content of the soil, this has the added benefit of suppressing weeds and locking in moisture. After this, you can either leave the plant to its own devices (fine on healthy, fertile soil), or apply a high potassium liquid feed as described above (beneficial on poor or sandy soil).
Cold Protection
Ipomoea will not survive a UK winter outdoors, nor do perennial species overwinter well undercover. We recommend all plants be discarded at the end of the growing season
Pests and Diseases
Ipomoea can be susceptible to powdery mildew in a dry summer, appearing as a white, powder-like coating on foliage.
A little TLC usually rectifies things. Simply prune off and dispose of any affected leaves, give the plant a good soak (avoiding water on the foliage if possible), and thin out surrounding plants to improve airflow. Do not be tempted to give an extra feed, as this will generate an excess of soft, new growth which is particularly vulnerable.
How to propagate Ipomoea
To collect and sow your own seed:
1. Seeds are typically ready for collecting in mid to late summer when the pods are brown and papery, and the seeds inside have turned hard and black.
2. Snip the seedheads from the plant using scissors or secateurs. Try to do this in dry conditions, and shake or separate the seeds into a small paper bag or envelope.
3. Back at the potting bench or a table, separate the seeds from the brown chaff. Return the seeds to the paper bag or envelope, label, and store somewhere cool and dry until it is time to sow the following spring.
4. Ipomoea needs a long growing season, so it pays to sow in early to mid spring. Fill several small pots with a well-draining compost mix, compressing the surface lightly with a flat piece of wood or the bottom of another pot.
5. Sprinkle the seeds thinly (i.e., spaced apart) over the surface of the compost.
6. Cover with a fine layer of compost or vermiculite.
7. Water the soil gently with a fine spray until it is evenly moist but not waterlogged.
8. Place the seed tray or pots in a heated propagation unit if you have one (set at 18°C), or cover pots with clingfilm if not. Position in indirect light.
9. As soon as the seeds begin to germinate, take out of the propagation unit or remove the clingfilm.
10. When the seedlings have grown large enough to handle, transplant them into individual pots filled with a well-draining mix and continue to grow on in a warm environment.
11. Keep just moist, never soggy.
12. Plant out once all risk of frost has passed, following our ‘How to plant ipomoea’ section above.
* Many plants carry Plant Breeders Rights and cannot be propagated for commercial purposes.
Common Ipomoea Questions
· Where does the name morning glory come from?
This common name refers to the flowers which open first thing in the morning. Each bloom lasts just one day.
· Where does ipomoea grow?
There are many hundreds of species found growing in warm regions all over the world. Those we’ve mentioned in this growing guide are largely from the Americas.
· Does ipomoea grow in shade?
Ipomoea will grow in partial shade, though the best flowering and leaf colour comes from a sunny spot.
