


How to grow Millettia
Millettia is a diverse genus of around 120 species of trees, shrubs, and climbers belonging to the pea family. Hailing from Africa, Madagascar, India, and east Asia, few of these can grow in our UK climate, though two species are just about tough enough. Millettia reticulata and M. japonica can be woody, twining climbers or scrambling shrubs, both going by the common names of evergreen wisteria and summer wisteria. Their racemes of highly scented, purple, pea-like flowers do indeed resemble those of wisteria (to which they are related), though the ’evergreen’ part of the name is misleading; in climates such as the UK they are more likely to be semi-evergreen or deciduous (unless grown indoors).
Although less hardy than wisteria, millettia offers a smaller, more manageable eventual size and later, high-season flowering period. It is a good choice for those who can offer shelter from the worst of the winter weather and are keen to grow something unusual and interesting.

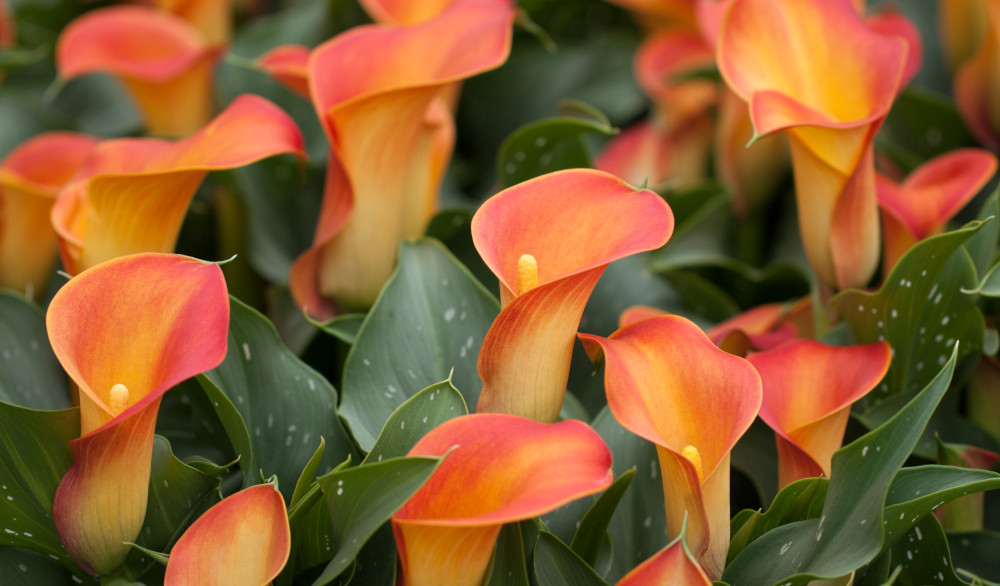
Zantedeschia is a genus of flowering plants from the family Araceae and is native to southern Africa. With a rich history dating back to the Ancient Romans, these deciduous or semi-evergreen perennials have been used as a symbol of celebration. Zantedeschia was Named after Professor Giovanni Zantedeschia, an Italian botanist.
There are two main forms of Zantedeschia: hardy and tender. Hardy forms of the plant can be grown outdoors, enjoy moist soil and full sun or partially shaded conditions - these are known as Arum lilies. Tender forms of Zantedeschia prefer being grown in containers or pots and should be brought inside over the winter - these are known as Calla lilies.
With tuberous flora in all colours from whites, yellows and oranges to deep reds and purples, Zantedeschias are not to be overlooked in any garden, as long as they have sufficient sunlight to grow in.
Ready to learn more about growing Zantedeschia? Read on for all there is to know...
Key Information
Soil pH

Position

Hardiness


Where & when to plant Millettia
Position - A sunny, sheltered spot.
Soil - Moderately fertile, well-draining.
Flowering Period - Summer.
Hardiness - Half-hardy, rated H3 (1 to -5°C)
Millettia grows naturally in a warm, frost-free climate, and can only survive outside in the UK once risk of hard frosts has passed. This varies from region to region, though tends to be mid to late May. If your plant arrives before it is safe to move it out, keep it in a protected environment such as a conservatory, greenhouse, or a sunny window or porch, until the time is right.
Gardeners in the milder, southern half of the UK may get away with growing millettia in the open ground at the base of a warm, sheltered wall, with protective measures taken during winter (see our ‘Cold Protection’ section below).
In chillier spots and further north, it is best to grow this as a greenhouse or conservatory plant. Try to find a spot with plenty of light though not directly in the midday sun, as sunlight becomes amplified when travelling through glass and can scorch plants.
Those lucky enough to offer a frost-free microclimate – perhaps in a sheltered coastal or urban location – can grow it outdoors all year round without concern.
How to plant Millettia
Millettia will need support, which should be installed prior to planting. This might be wires or a trellis fixed to a wall or fence, or a standalone structure such as an arch or pergola.
· For planting in the ground, first the soil area over, removing any large stones and weeds and breaking up any lumps. Mix in a generous amount of organic matter such as manure or garden compost (this is especially needed at the base of walls, where the soil can be dry and poor).
· Rake level and firm with your heels. Rake level again.
· Now dig the planting hole, aiming for twice the width of the roots. If you are planting against a wall, plant the millettia 30 centimetres away from its base.
· Place the plant in the hole, ensuring the top of the root ball sits level with the surface of the soil. To high and the roots can dry out, too low and the stem can rot.
· Backfill with soil and firm in gently with your foot.
· Soak well with water.
· Mulch around the base with well-rotted organic matter such as manure or garden compost.
· Tie into the support using soft garden twine.
· For planting in a container first choose an appropriately sized pot at least 45cm across. You’ll need to repot into a slightly larger pot every few years. Always ensure there are plenty of drainage holes in the bottom.
· It can be a good idea to fill and plant your pot in situ to save yourself the trouble of moving it once full.
· Use a good quality, loam-based potting compost with plenty of horticultural grit mixed in, and, if not already present in the compost (check the description on the bag) some slow-release fertiliser granules.
· Start by partially filling the pot with compost; enough so that when placed on it the top of the roots sit about 3cm lower than the top of the pot.
· Infill all the space surrounding the roots with compost, firming down with your fingers then adding a little more so the plant is held tight. Again, remember to ensure the graft union sits just above the surface of the compost.
· Pick up the pot (if you can!) and lightly tap on the potting bench or ground a few times to help further settle the compost around the plant.
· Soak well with water.
· A mulch with horticultural grit will look attractive and help to prevent a ‘cap’ or crust forming on the top of the compost (something container plants can suffer due to the artificial nature of their watering).

What to plant with Millettia
If you have the sheltered, mild conditions needed to grow millettia, a host of other half-hardy climbers is also at your fingertips. Whether clothing a warm, sunny wall or transforming a greenhouse or conservatory into a verdant paradise, things such as hardenbergia, sollya, abutilon, plumbago, and cestrum make perfect companions.


How to care for Millettia
Pruning and Deadheading
Climbing species of millettia fall into RHS pruning group 11. This means regular pruning is not needed, though trimming may be required to keep the plant from outgrowing the available space. This should be done immediately after flowering, removing as much from the longer shoots as necessary. Remove dead, diseased, and damaged growth while you’re at it, and tie in the remaining growth to fill any gaps.
Watering
In the ground, give millettia a good soak on initial planting, and then regularly throughout the first growing season. Once established it should require watering only in the most prolonged periods of hot, dry weather.
Container grown millettia can be watered freely throughout every growing season, being aware that in the height of summer watering may be needed as often as every day. Scale back in winter, watering just enough to keep the compost from drying out completely.
Feeding
In healthy, fertile soil, a mulch of well-rotted organic matter (i.e., a layer of leaf mould, manure, or garden compost applied to the soil around the plant) should provide sufficient nutrients for your millettia. This has the added benefit of suppressing weeds and locking in moisture. Mulch when planting, and then again each spring.
If you feel your millettia could do with a boost (perhaps you garden on poor soil or have just carried out a renovation prune), a dose of balanced fertiliser such as blood, fish, and bone can work wonders. Do this in spring, ideally in conjunction with mulching. First apply the feed, lightly fork into the surface of the soil, water, then mulch.
Container-grown plants rely solely on the gardener for nutrition and therefore need a little more attention when it comes to feeding. Get off to a flying start by making sure you use a good quality compost with slow-release granules mixed in, then throughout the growing season (March to October) apply a balanced liquid feed once a month. Remember also to repot your millettia every few years into a larger pot with fresh compost. When this is no longer feasible, we advise a top dress each spring. Simply scrape away the top few centimetres of compost and replace with fresh (not forgetting to mix in some slow-release granules).
Cold Protection
If you are growing your millettia outdoors, there are a few extra measures you can take to help it survive winter. A thick, dry mulch covering the roots in autumn will help protect against the cold and wet (bark chips, straw, bracken, or grit all work well), and a sheet of horticultural fleece or old bedsheet can be used to protect top growth whenever a cold snap is expected.
Pests and Diseases
Like most plants, millettia can be affected by the usual issues of spider mite, aphids, and whitefly when grown indoors. Keeping plants as healthy as possible is the key to warding off problems, and by this we mean proper ventilation, adequately spaced plants (for good air flow), keeping everything well-watered and fed, and repotting into larger containers when necessary. Thoroughly cleaning the indoor environment every winter can also help to remove overwintering populations of pests.
Where infestations do take hold, try introducing biological controls (often sachets or tubes containing miniscule natural predators), or in the worst cases, remove the affected plant/s altogether.
How to propagate Millettia
Most species of digitalis will self-seed readily, meaning the quickest and easiest way to ensure an ongoing presence in your garden is to simply do nothing! Leave spent flowers intact and remember to look out for seedlings when weeding or hoeing in spring.
Some cultivars or hybrids (E.g., D. purpurea ‘Pam’s Split’ or D. x mertonensis) produce little or no seed, so you’ll need to buy new plants to replace these.
If you wish to collect and sow seed yourself, follow these simple steps:
- Seeds are typically ready for collecting in late summer when the seedheads have dried and turned brown.
- Snip the seedheads from the plant using scissors or secateurs. Try to do this in dry conditions, and place in a small paper bag or envelope.
- Fill a seed tray or small pot with a very well-draining compost mix, compressing the surface lightly with a flat piece of wood or the bottom of another pot.
- Sprinkle the tiny seeds evenly over the surface of the compost, pressing down lightly to ensure contact.
- Digitalis seeds germinate best when left uncovered, so don’t sprinkle any compost on top as you would usually with seed sowing.
- Water the soil gently with a fine spray until it is evenly moist but not waterlogged.
- Place the seed tray or pots in a coldframe, unheated greenhouse, or on a cool, bright windowsill.
- When the seedlings have grown large enough to handle, transplant them into individual pots filled with a very gritty mix and continue to grow on in a frost-free environment.
- Keep barely moist, never soggy.
- Plant out the following spring, following our ‘How to plant digitalis’ section above.
* Many plants carry Plant Breeders Rights and cannot be propagated for commercial purposes.
Common Millettia Questions
How fast growing is millettia?
Millettia has a vigorous growth rate. Expect it to reach flowering maturity in four to five years.
How long does millettia flower for?
Millettia can bloom for several months, starting in summer and continuing well into autumn.
I regularly experience cold winters and don’t have any indoor growing space, can I grow millettia?
This probably isn’t the climber for you. Try hardier alternatives instead, such as wisteria, clematis, honeysuckle, a climbing rose, or a wall shrub like pyracantha or chaenomeles.
