


How to grow Sedum (Hylotelephium)
This succulent, fleshy-leaved perennial is one of the most reliable plants around. Though there are around 400 different species, the most popular can be roughly split into two groups. The type known as border sedums (which have recently been renamed as hylotelephium) are popular for their attractive, grey-green foliage throughout spring and summer, and flat, nectar-rich flowerheads in late summer and autumn. The seedheads are often left on the plant throughout winter for structural interest, giving the plants year-round appeal.
The type known as stonecrop (and still officially named sedum) are spreading, mat-forming plants with small, succulent foliage and heads of star-shaped flowers. They make good ground cover and are popular for green roofs.
Sedum is a spectacularly easy to grow plant with an extremely resilient nature. Poor, dry soil, exposed windy sites, and harsh winters are no problem for this garden stalwart, and while it may not be the showiest of plants, few perennials offer so much while asking for so little. The renowned gardener Beth Chatto put it perfectly when she wrote “modest plants can mean as much to me as their flamboyant neighbours. Too many star performers lumped together can become quarrelsome; neutral areas between them keep the peace. Sedums make very good peacemakers and are so dependable, providing interest for almost every month of the year. Few herbaceous plants can do that.”

Zantedeschia is a genus of flowering plants from the family Araceae and is native to southern Africa. With a rich history dating back to the Ancient Romans, these deciduous or semi-evergreen perennials have been used as a symbol of celebration. Zantedeschia was Named after Professor Giovanni Zantedeschia, an Italian botanist.
There are two main forms of Zantedeschia: hardy and tender. Hardy forms of the plant can be grown outdoors, enjoy moist soil and full sun or partially shaded conditions - these are known as Arum lilies. Tender forms of Zantedeschia prefer being grown in containers or pots and should be brought inside over the winter - these are known as Calla lilies.
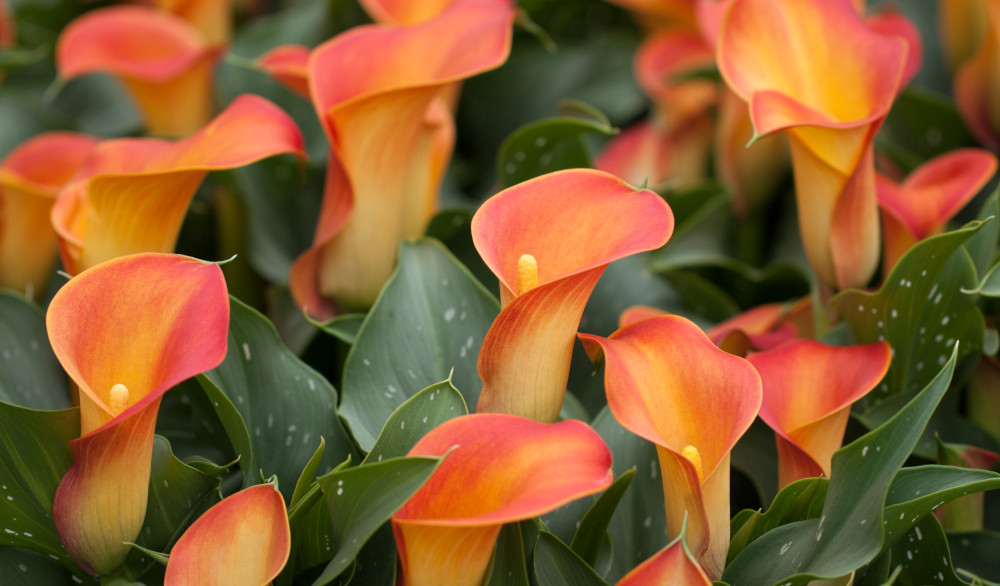
With tuberous flora in all colours from whites, yellows and oranges to deep reds and purples, Zantedeschias are not to be overlooked in any garden, as long as they have sufficient sunlight to grow in.
Ready to learn more about growing Zantedeschia? Read on for all there is to know...
Key Information
Soil pH

Position

Hardiness


Where & when to plant Sedum
Position - The best flowering occurs in full sun, though partial shade will be tolerated.
Soil - Any reasonable garden soil. The one thing to avoid is winter waterlogging.
Flowering Period - Late summer and autumn
Hardiness - Hardy, mostly rated H7 (-20°C and below)
For best results, plant in autumn or spring. An autumn planting can be done by those gardening in mild conditions (and broadly speaking, this is the southern half of the UK). For those liable to cold winters, it is best to wait until spring (generally the northern half of the UK). Planting can also be carried out in summer, though be prepared to water regularly.
Border sedums are relatively low-growing plants and so are best used towards the front of a border. As famous fan Beth Chatto observes, they make excellent ‘filler’ plants for gaps between showier companions.
Stonecrops can be used to spread and cascade over walls, steps, and rock gardens. They also do well in containers, particularly stone troughs, and are often a major component of green roofs.
How to plant Sedum
· For planting in the garden, dig the soil area removing any large stones and weeds and breaking up any lumps. If your soil is especially poor, now is your chance to improve it by mixing in some organic matter such as manure or garden compost. Don’t worry about doing this on already healthy, fertile soil – too many nutrients can do sedum more harm than good. Rake level and firm with your heels. Rake level again.
· Water your plant well and allow it to drain before planting.
· Dig a hole twice the size of the root-ball.
· Place the plant in the hole, ensuring the top of the root ball sits level with the surface of the soil. Too low and the plant may rot, too high and the roots can dry out.
· Backfill with soil and firm in gently.
· Soak well with water.
· Mulch around the base with well-rotted organic matter.
· For planting in a container, find a pot a few centimetres larger than the rootball (or larger if mixing with other plants), ensuring there are plenty of drainage holes.
· If you are using a heavy pot, it can be a good idea to fill and plant it in situ to save yourself the trouble of moving once full.
· Use a good quality potting compost with plenty of horticultural grit mixed in, and, if not already present in the compost (check the description on the bag) some slow-release fertiliser granules.
· Start by partially filling the pot with compost; enough so that when placed on it the upper surface of the root ball is about 3 centimetres lower than the top of the pot.
· Infill all the space surrounding the root ball with compost, firming down with your fingers then adding a little more so the plant is held tight.
· Pick up the container and lightly tap on the potting bench or ground a few times to help further settle the compost around the plant.
· Soak well with water.
· A mulch with horticultural grit will look attractive and help to prevent a ‘cap’ or crust forming on the top of the compost (something container plants can suffer due to the artificial nature of their watering).

What to plant with Sedum
Border sedums fit easily with almost any planting style. Our main advice is to aim for a mixture of textures and forms – as well as the flat flowerheads of sedum, try to include some upright spires, some open, daisy-like blooms, and some rounded flowers. Those with a similar, late flowering period include veronicastrum (spires), echinacea, aster, and rudbeckia (daisies), and eryngium (rounded). Ornamental grasses add fulness and movement, and look especially magical at this later point in the year when their delicate seedheads are at their peak. Miscanthus, panicum, and deschampsia are a few favourites, and we never miss an opportunity to include Stipa teniuissima ‘Ponytails’.
Stonecrop types make natural bedfellows for other spreading, groundcover plants such as ajuga, creeping thyme, wall bellflower, and creeping phlox. Knit these together to turn walls, paving cracks, and steps into a patchwork of colour and texture.


How to care for Sedum
Pruning and Deadheading
Border sedum can sometimes flop midway through the growing season, particularly when grown in partial shade or very rich soil. To avoid this, try giving your plant the ‘Chelsea chop’, i.e., cutting it back by a third to a half in the last week of May (when the Chelsea Flower Show traditionally takes place). If the shorn look is too drastic for your tastes, an alternative approach is to cut half the stems down to the ground while leaving the rest intact.
Other than this, border sedums are wonderfully low maintenance. Resist the urge to cut them back in autumn as the strong, dark seedheads make a striking feature throughout winter, especially with a dusting of frost or snow. They also provide a valuable overwintering habitat for insects and other wildlife. Unlike many other perennials left intact, the stems of sedum don’t collapse part way through winter but remain standing firm until it is time to cut them back in February/ March. By that point, you will see tiny rosettes of new foliage forming at the base (one of the loveliest sights in the garden at this time of year!). Simply cut spent stems off to just above ground level, and watch the whole thing start again.
Stonecrops types can either be left to their own devices, or, if you like, cut back after flowering to maintain a neat shape.
Watering
In the open ground, sedum should be given a good soaking on planting, then a handful of times after this over the following few weeks. Due to the water-storing properties of its succulent leaves, sedum has a high tolerance of drought, and once established is self-sufficient in all but the most prolonged periods of dry weather (i.e., months-long drought!)
Container-grown sedum, on the other hand, will need to be watered throughout every growing season. A good rule of thumb to avoid overdoing it is to water only once the top few centimetres of compost have dried out.
Feeding
On healthy, fertile soil, an annual mulch of well-rotted organic matter should provide more than enough nourishment for your sedum (manure or garden compost are ideal). As well as boosting the nutrient content of the soil, mulch has the added benefits of locking in moisture and suppressing weeds. Try to avoid feeding any more than this, as too many nutrients can lead sedum to put on excessively lush, floppy growth.
Container grown sedum needs a little more input, though it is still important not to overdo it. A good quality compost with slow-release granules mixed in generally provides enough nutrients for six weeks, after which a monthly dose of half-strength balanced liquid feed should offer roughly the right amount of nutrients. Stop feeding at the end of the growing season, and restart the following spring. Remember also to repot into fresh compost (always with slow-release granules mixed in), every year or two. When the plant is fully grown and going up a pot size is no longer feasible, you can carry out an annual topdress instead. Simply scrape away the top few centimetres of compost and replace with fresh.
Cold Protection
Most of the sedum you’re likely to find in UK nurseries and garden centres are fully hardy, meaning they’re able to withstand a UK winter without the need for additional protection. The key is to avoid soil which becomes waterlogged in winter (one of the quickest ways to kill even the hardiest of plants).
That said, there are tender and half-hardy sedum species, although these are less widely available and usually sold as houseplants. Always check the description, just to make sure.
Pests and Diseases
Sedums are relatively robust when it comes to pests and diseases. They may suffer with minor niggles such as powdery mildew (particularly when grown on very dry soil), or damage from slugs and snails, though usually recover from these issues on their own. As always, we advise that the best line of defence is to get the growing conditions and maintenance right, as healthy, thriving plants are less vulnerable to problems than those that are poorly grown.
How to propagate Sedum
The quickest and easiest way to propagate sedum is to lift and divide established clumps. As well as providing new plants, this breathes life into tiring clumps and is recommended as a routine maintenance practice every three to four years. Sedums are best divided in spring:
· Choose a day when the soil is not frozen or waterlogged.
· Dig the plant out of the ground and shake off any excess soil.
· Separate into sections using either swift, cutting blows with a sharp spade, or two forks inserted back-to-back with tines touching, handles then pushed together to prise the plant apart.
· Discard old, damaged, or surplus pieces, keeping healthy, vigorous material with roots attached.
· Replant decent-sized pieces where desired, and any smaller bits can be potted up.
· Water well until fully established.
Softwood cuttings are another successful propagation method for sedum, and can be taken from a clump of any age. Do this in early summer:
· Look for non-flowering growth from the current year, which is firm and woody at the base while still soft and pliable at the tip. You’re aiming for a cutting of 10 centimetres or less (any longer and they are more likely to dry out and fail). For best results, choose stems where the leaf nodes are close together rather than far apart.
· Using a sharp knife or secateurs, sever the cutting from the plant and put in a plastic bag straight away.
· Fill a pot (or several, if you have a lot of cuttings) with a perlite-heavy compost mix (at least 50% perlite).
· Trim the end of the cutting to just below a node (point at which leaves grow).
· Remove lowest leaves and soft tip, leaving 2-4 leaves.
· If the remaining leaves are large, cut them in half with a sharp knife to reduce water lost through transpiration.
· Insert the cuttings into the compost and water lightly. Several cuttings can be put in the same container if there is enough space to do this without them touching.
· Place in a greenhouse or propagating unit if you have one, or covered with a plastic bag on a windowsill if not (out of direct sunlight).
· Keep the cuttings misted and occasionally watered until they root. You will know this has happened when roots emerge out of the bottom of the container.
· Gently remove rooted cuttings and pot them into individual pots. Grow on in a cool yet frost-free environment such as an unheated conservatory, greenhouse, or cold frame, until they are large enough to be potted or planted as above.
You may also notice rooted shoots at the bases of stems, which often separate from the parent plant in late winter. These can be gently lifted and replanted to form new clumps elsewhere. Alternatively, pot up and grow on to plant out at a later date.
* Many plants carry Plant Breeders Rights and cannot be propagated for commercial purposes.
Common Sedum Questions
Where does sedum grow best?
The natural origins of sedum are mountainous and arid areas, therefore they feel most at home in a sunny, well-draining spot where the soil is low in nutrients.
Does sedum spread quickly?
Sedum has a fast growth rate and can reach full height and spread in just a couple of years.
Does sedum come back every year?
Yes, the types of border sedum popular in UK gardens are herbaceous perennials, meaning they die back for winter and regrow in spring. Many of the stonecrop types are evergreen.
Will sedum choke out other plants?
Sedum is a strong grower with dense foliage and, like any plant, should be given adequate space to mature.
Is sedum poisonous?
All parts may cause mild stomach upset if ingested, and the sap may irritate skin.
Is sedum good for wildlife?
Yes – with its late season flowers, this harbinger of autumn is a valuable source of nectar for bees, butterflies, and many other pollinators at a time when many other plants in the garden have finished blooming. Left on the plant until spring, its stems also provide an overwintering habitat for a range of wildlife.
