


How to grow Skimmia
Skimmia is one of those plants you can expect to encounter almost everywhere you go, from playgrounds to supermarket carparks and many places in between. As is the case with any widely grown plant this can mean it is taken for granted and perhaps not seen as the most exciting of options, however useful to consider why a plant may have become so ubiquitous. Often, it’s due to a spectacularly undemanding nature, an ability to thrive in difficult conditions, or exceptional garden value. Or, as in the case of skimmia, all three!
Found growing wild in woodland from the Himalayas to South East Asia, China, and Japan, skimmia is an evergreen shrub valued for its handsome evergreen foliage and neat, compact, rounded form. As a member of the citrus family its flowers are often powerfully scented, and in some cases followed by long-lasting, glossy berries. Even the flower buds make an attractive feature, sometimes appearing as early as autumn and adding to the year-round appeal of this hardworking shrub. Ever obliging, skimmia will grow happily in partial to deep shade, copes with a range of soil types, and tolerates atmospheric pollution. Rarely does it ask for pruning either, and in fact remains largely untroubled by complete neglect.
When choosing between the many different types of skimmia available, it is useful to understand the difference between male, female, and hermaphrodite forms. Male cultivars (such as ‘Rubella’, ‘Fragrant Cloud’, ‘Kew Green’, ‘Fragrans’) are noted for the intensely powerful fragrance of their flowers, though do not produce berries. Female cultivars (e.g., Olympic Flame’, ‘Nymans’, ‘Red Riding Hood’) are less strongly scented though will, if there is a male planted nearby, bear lots of fruit which can last through autumn and into winter. Hermaphrodite forms will produce berries in isolation so are a good option for small spaces where multiple shrubs are not an option, though these are fewer and more difficult to come by. The best-known example is Skimmia japonica subsp. reevesiana.

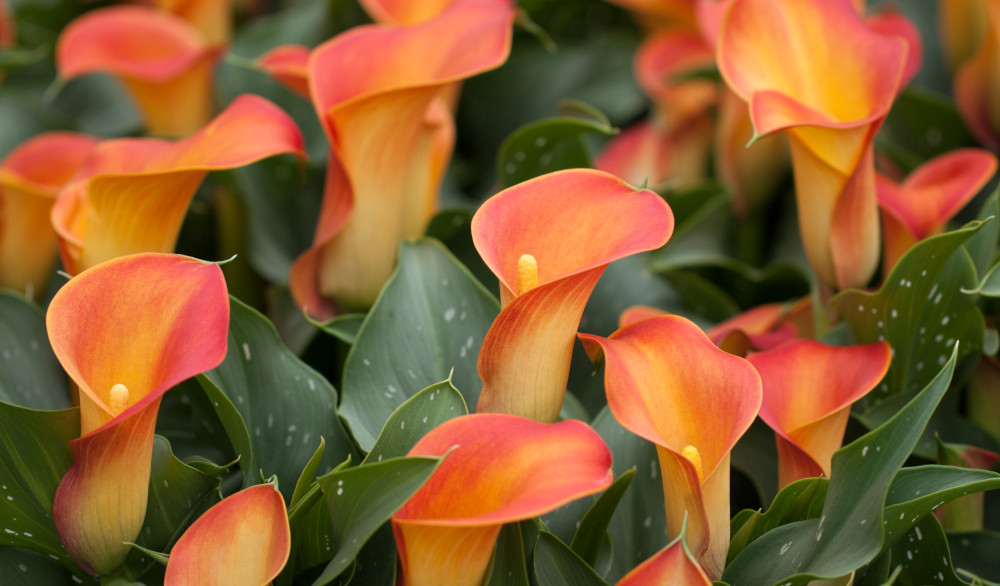
Zantedeschia is a genus of flowering plants from the family Araceae and is native to southern Africa. With a rich history dating back to the Ancient Romans, these deciduous or semi-evergreen perennials have been used as a symbol of celebration. Zantedeschia was Named after Professor Giovanni Zantedeschia, an Italian botanist.
There are two main forms of Zantedeschia: hardy and tender. Hardy forms of the plant can be grown outdoors, enjoy moist soil and full sun or partially shaded conditions - these are known as Arum lilies. Tender forms of Zantedeschia prefer being grown in containers or pots and should be brought inside over the winter - these are known as Calla lilies.
With tuberous flora in all colours from whites, yellows and oranges to deep reds and purples, Zantedeschias are not to be overlooked in any garden, as long as they have sufficient sunlight to grow in.
Ready to learn more about growing Zantedeschia? Read on for all there is to know...
Key Information
Soil pH

Position

Hardiness


Where & when to plant Skimmia
Position - Light dappled shade to deep shade.
‘Kew Green’ will grow in full sun, though other forms are likely to yellow if exposed to too much light.
Soil - Happy on most soil types apart from the extremes of waterlogged or bone dry.
Flowering Period - Spring, though buds appear much earlier, often providing interest during winter.
Hardiness - Hardy. Mostly rated H5 (-10 to -15°C)
In theory skimmia can be planted at any time of year apart from when the ground is frozen, though best results come from doing so in autumn or early spring. An autumn planting is recommended for those gardening in mild conditions (and broadly speaking, this is the southern half of the UK). For those liable to cold, wet winters, it is best to wait until spring (generally the northern half of the UK, or those with very heavy soil). A summer planting is the least preferable as woody plants struggle to establish well from this.
In terms of choosing a planting spot, skimmia is useful for shady shrub borders, understory planting beneath deciduous trees, or anywhere with a north, east, or west-facing aspect. Unaffected by air pollution, it is a handy option for urban or roadside environments, and a slow-growing nature means it can happily spend life in a container. It can also be used as an informal low-growing hedge which won’t require trimming.
If you’re starting off with a small specimen, you could have it as part of a mixed container or window box for the first few years, then plant it out into the garden or its own pot when a little larger.
How to plant Skimmia
Water well and allow to drain before planting. Then:
· For planting in the open ground, dig the soil area over, removing any large stones and weeds and breaking up any lumps. Now is your chance to mix in plenty of well-rotted organic matter such as manure or garden compost.
· Rake level and firm with your heels. Rake level again.
· Dig a hole twice the width of the roots.
· Place the plant in the hole, ensuring the top of the root ball sits level with the surface of the soil. Too high and the roots can dry out, too low and the stem can rot.
· Backfill with soil and firm in gently with your foot.
· Soak well with water.
· Mulch around the base with well-rotted organic matter.
· For planting in a container, first choose an appropriately sized pot. The best practice (particularly with something as slow growing such as skimmia) is to start just a few centimetres (i.e., no more than 5 centimetres) larger than the root ball and repot into a slightly larger size every two or three years. Always ensure there are plenty of drainage holes in the bottom.
· Use a loam-based compost suitable for mature plants (John Innes No 3 is ideal), with a little horticultural grit mixed in, and, if not already present in the compost (check the description on the bag) some slow-release fertiliser granules.
· Start by partially filling the pot with compost; enough so that when placed on it the top of the roots sits about 3 centimetres lower than the top of the pot.
· Infill all the space surrounding the roots with compost, firming down with your fingers then adding a little more so the plant is held tight.
· Pick up the pot (if you can!) and lightly tap on the potting bench or ground a few times to help further settle the compost around the plant.
· Soak well with water.
· A mulch with horticultural grit will look attractive and help to prevent a ‘cap’ or crust forming on the top of the compost (something container plants can suffer due to the artificial nature of their watering).

What to plant with Skimmia
If you are attracted to skimmia for its easy, fuss-free nature, similarly low-maintenance plants happy in the same shady conditions include sarcococca, viburnum, mahonia, and daphne.


How to care for Skimmia
Pruning and Deadheading
Skimmia comes under the RHS Pruning Group 8 category, which means pruning is rarely necessary and in fact may spoil the natural shape of the shrub. Occasionally an over-vigorous shoot may need to be removed to maintain a pleasing shape, otherwise, leave well alone.
Note that skimmia tends not to respond well to a hard, regenerative prune. Instead, it is usually best to replace tired, old specimens with a fresh, young plant.
Watering
Like all woody plants, skimmia establishes best from being regularly watered during its first growing season in the ground. After this it should be largely self-sufficient.
Container-grown skimmia has less access to moisture so will need to be kept watered throughout every growing season. A useful rule of thumb to avoid overdoing it is to only water once the top couple of centimetres of compost have dried out. Be aware, however, that during the height of summer this can happen in as little as 24 hours. From mid-autumn, the British climate tends to take over watering needs, though do remember to step in in the event of an unseasonably dry spell.
Feeding
While skimmia in the ground will be fine without any additional feeding at all, an annual mulch of well-rotted organic matter certainly won’t do any harm. This also has the added benefit of suppressing weeds and locking in moisture, and is best done in autumn or spring.
Container-grown plants rely more on the gardener for nutrition. Get off to a flying start by making sure you use a good quality, loam-based compost specifically for mature plants (John Innes No. 3 is ideal), then throughout the growing season (March to September) apply a liquid feed once a month. Remember also to repot into a slightly larger pot using fresh compost every few years, and once this is no longer feasible, carry out an annual topdress in spring. Scrape away the top 5 centimetres of compost and replace with fresh, mixing in a little general-purpose slow-release feed.
Cold Protection
Skimmia is hardy enough to withstand a UK winter without the need for additional protection. Any winter losses we’ve seen have been down to excessive winter wet, so do try to give yours a well-draining spot if you live in an especially wet part of the UK.
Pests and Diseases
Skimmia is generally robust and trouble-free (it is notably unpalatable to deer and rabbits), though does occasionally succumb to scale insects.
Small populations of these are unlikely to do harm and should be tolerated where possible. As always, we recommend the best line of defence to be creating a healthy, balanced garden ecosystem by encouraging as many species of insects and mammals into the garden as possible. Natural predators of scale insects include ladybirds, parasitic wasps, and birds, so try to boost their numbers by growing a wide range of pollinator-friendly plants, not using chemicals, and providing suitable habitats.
How to propagate Skimmia
Skimmia is best propagated by semi-ripe cuttings in late summer, using growth that is becoming firm and woody at the base but is still flexible at the tip.
· Snip cuttings off the plant, if possible taking a longer piece than the ideal eventual length of around 10cm (to allow for trimming).
· Put in a plastic bag straight away to prevent drying out.
· Fill several pots with a well-draining compost mix.
· Trim the end of the cutting to just below a node (point at which leaves grow).
· Remove all but the top 2-4 leaves.
· If the remaining leaves are large, cut them in half with a sharp knife (to reduce water lost through transpiration).
· Insert the cuttings into the compost and water lightly. Several cuttings can be put in the same container if there is enough space to do this without them touching.
· Place in a propagating unit with bottom heat if you have one or covered with a plastic bag on a windowsill if not (out of direct sunlight).
· Keep the cuttings misted and occasionally watered until they root. You will know this has happened when roots emerge out of the bottom of the container – expect this to happen the following spring.
· Gently remove rooted cuttings and pot them into individual pots. Grow on in a cool yet frost-free environment such as an unheated conservatory, greenhouse, or cold frame, until they are large enough to be planted out as above.
* Many plants carry Plant Breeders Rights and cannot be propagated for commercial purposes.
Common Skimmia Questions
· Does skimmia need ericaceous compost?
No. There is a common misconception that skimmia prefers acidic growing conditions (it is often lumped in with things like camellias, rhododendrons, and pieris), however it is in fact happy in any soil pH.
· Does skimmia grow in shade/ where does skimmia grow best?
Yes. Light, dappled shade is the ideal, though deep shade will also be tolerated. Try to avoid full sun, apart from with exception to the rule ‘Kew Green’.
· Is skimmia poisonous to dogs?
While the berries of skimmia may result in mild stomach upset if ingested, they would have to be eaten in enormous quantities to cause severe problems.
· Do you deadhead skimmia?
Only if you’re feeling desperately tidy! Removing spent flower heads will not result in a second flush, and, in the case of female or hermaphrodite forms will mean missing out on the berries later in the year. Most gardeners choose to leave these intact, allowing them to shed naturally.
