


How to grow Tulbaghia
Tulbaghia is a perennial plant from southern Africa. It grows from corm-like rhizomes, forming a neat clump of grassy foliage and sending up long stems bearing heads of delicate, usually pale mauve, often scented blooms. Most UK gardeners grow this half-hardy plant in a container, for ease of moving it into a protected indoor environment for winter. As container plants go it is hard to better, blooming steadily from early/ midsummer right the way into autumn.
The most widely grown species in the UK is the grey-green-leaved Tulbaghia violaceae, of which there are many forms and hybrids offering variegated foliage (‘Silver Lace’), white or pink flowers (‘Pearl’, ‘Ashanti’, ‘Kilimanjaro’), or pink-blushed leaves (‘Flamingo’).
The leaves of tulbaghia can be snipped and eaten like chives. Unlike other members of the onion family, it doesn’t leave a lasting aroma in the mouth, earning it the common name of ‘society garlic’. When grown in the ground the roots are said to keep moles out of the garden, though this is not something we can vouch for ourselves!

Zantedeschia is a genus of flowering plants from the family Araceae and is native to southern Africa. With a rich history dating back to the Ancient Romans, these deciduous or semi-evergreen perennials have been used as a symbol of celebration. Zantedeschia was Named after Professor Giovanni Zantedeschia, an Italian botanist.
There are two main forms of Zantedeschia: hardy and tender. Hardy forms of the plant can be grown outdoors, enjoy moist soil and full sun or partially shaded conditions - these are known as Arum lilies. Tender forms of Zantedeschia prefer being grown in containers or pots and should be brought inside over the winter - these are known as Calla lilies.
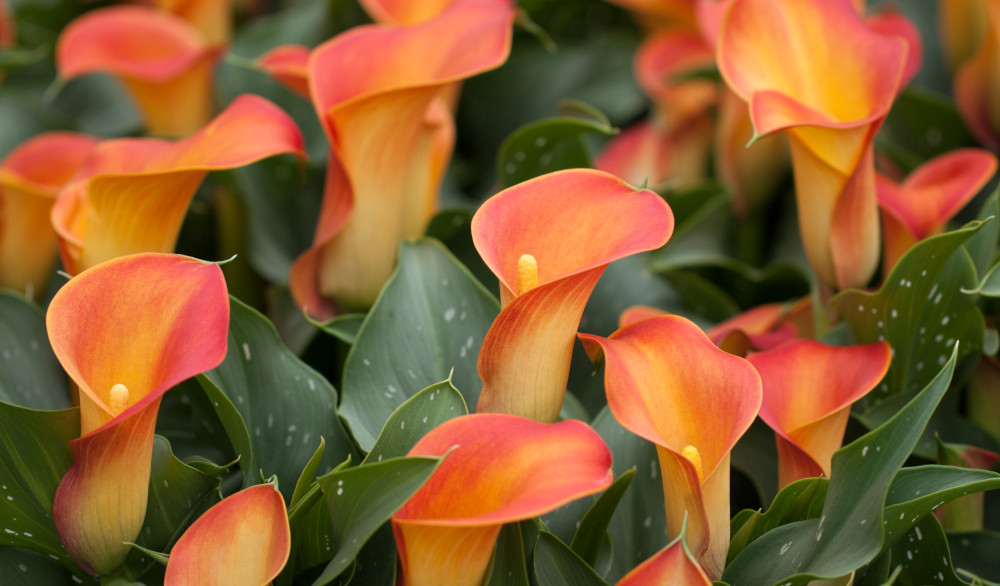
With tuberous flora in all colours from whites, yellows and oranges to deep reds and purples, Zantedeschias are not to be overlooked in any garden, as long as they have sufficient sunlight to grow in.
Ready to learn more about growing Zantedeschia? Read on for all there is to know...
Key Information
Soil pH

Position

Hardiness


Where & when to plant Tulbaghia
Position - Full sun is best. Tulbaghia will grow in partial shade though this means far fewer flowers.
Soil - Any good garden soil, i.e., well-draining, moderately fertile, humus-rich, and loamy.
In a container, use a well-draining, loam-based potting compost such as John Innes No. 2 with added grit.
Flowering Period - Summer and early autumn
Hardiness - Half-hardy, usually rated H3 (1 to -5°C)
Tulbaghia can be bought either as pot-grown plants or bare rhizomes. Pot grown plants can, in theory, be planted at any time of year, though best results come from an autumn or spring planting. Bare rhizomes should be planted as soon as they arrive.
Throughout most of the UK, it is advisable to grow tulbaghia in a container so it can be easily moved indoors for winter protection. You will often see it as the centrepiece on an outdoor table, allowing its delicate beauty and scent to be fully appreciated, or as part of a container display on a sunny terrace, patio, or area of decking.
Those in coastal areas or with very mild conditions (e.g., an urban courtyard or walled garden) can also grow tulbaghia in the ground – just be aware that tulbaghia doesn’t like to be crowded by other plants so will need plenty of breathing space. You may also get away with growing it in the ground if your soil is free-draining and you live in a relatively mild region (usually the southern half of the UK), though you’ll need to protect with a dry, winter mulch as described in the ‘Cold Protection’ section below.
How to plant Tulbaghia
- Firstly, find a container with plenty of drainage holes in the bottom and a good quality loam based potting compost. If not already present in the compost (check the description on the bag), add some horticultural grit and some slow-release fertiliser granules too.
- Partially fill the container with compost and place the plant/ bare root on top. Aim to have the rhizomes at a depth of 5 centimetres and around 15-20 centimetres apart.
- Fill the remainder of the container with compost, leaving a small gap of 2-3 centimetres between the surface of the compost and the top of the container.
- Pick up the container and lightly tap on the potting bench or ground a few times to help further settle the compost around the plant.
- Soak well with water.
- A mulch with horticultural grit will look attractive and help to prevent a ‘cap’ or crust forming on the top of the compost (something container plants can suffer due to the artificial nature of their watering).
· For planting in the ground, first clear the chosen area of weeds.
· Dig a planting hole several times larger than the root ball (if pre-potted), or bare root rhizome. It is a good idea to mix in some well-rotted organic matter at this stage. Leaf mould is ideal, though garden compost or manure also work well.
· Place in the hole, with the rhizome at a depth of 5 centimetres.
· Aim for a spacing of around 25 centimetres (like most plants, they require more space in the open ground than when in a container).
· Backfill with soil and firm in gently.
· Soak well with water.

What to plant with Tulbaghia
Tulbaghia is one of our top picks for providing easy, summer-long colour in a container, along with fellow non-stop bloomers pelargonium, diascia, gaura, grasses, erysimum and erigeron.


How to care for Tulbaghia
Pruning and Deadheading
Deadheading flower stems as they begin to form seedpods will help to stimulate more later in the season. Snip off as close to the base as you can, taking care not to cut into any leaves.
At the end of the growing season, remove all flower stems and allow the leaves to die back naturally. The exception to this is if you’re going to try and overwinter tulbaghia in the open ground, in which case the leaves should be cut down to around 10 centimetres before you cover the plant with a thick, dry, insulating mulch (see ‘Cold Protection’ below).
Watering
Tulbaghia tolerates drought, though will flower much better when given plenty of moisture. Keep well-watered when in growth (May to September) and expect to be watering daily during the height of summer. Scale the watering back as the leaves wither. Reduce again as the plant enters winter dormancy, keeping almost dry until the following spring.
Feeding
Tulbaghia grown in a container will benefit from an occasional high potash feed to keep flowering going – tomato food is ideal. Aim for a dose every 3-4 weeks during the growing season.
Cold Protection
In most places throughout the UK, tulbaghia will need winter protection. If grown in a container it can be moved into a sheltered, frost-free environment such as a conservatory, greenhouse, porch, or windowsill. Do this around September-October, moving back outside once all risk of frost has passed, usually May-June. It’s worth knowing that the leaves of tulbaghia can give off quite a strong, oniony smell as they die back for winter, so it can be a good idea to choose a more ‘out of the way’ spot if this is likely to offend!
If you can offer free-draining soil and live in an area where winters remain relatively mild, you may get away with growing tulbaghia in the open ground with a thick, insulating layer of dry mulch such as bark chips, straw, or bracken. Cut the plant down to around 10 centimetres in September-October, then pile the mulch on top.
For those lucky few UK gardeners with a frost-free microclimate (whether that be the result of a coastal location or the insulating presence of walls or buildings), tulbaghia can be left in the open ground with no extra protection needed.
Pests and Diseases
Tulbaghia is considered trouble free.
How to propagate Tulbaghia
Tulbaghia can be propagated by seed. These germinate easily and are quick to reach flowering size.
1. Seeds are typically ready for collecting in late summer/ early autumn once they have turned hard and black.
2. Snip the seedheads from the plant using scissors or secateurs. Try to do this in dry conditions, and place in a small paper bag or envelope.
3. Seeds can either be sown straight away or stored until spring.
4. Fill a seed tray or small pot with a well-draining compost mix.
5. Sprinkle the seeds evenly over the surface of the compost, pressing lightly into the soil with a flat piece of wood or the bottom of another pot.
6. Use a garden sieve to cover with a fine layer of compost. Don’t bury them too deeply.
7. Water the soil gently with a fine spray until it is evenly moist but not waterlogged.
8. Label the tray or pot.
9. Place in a coldframe, unheated greenhouse, or on a cool, bright windowsill.
10. Water periodically, ensuring the soil remains evenly moist but not waterlogged.
11. When the seedlings have grown large enough to handle, transplant them into individual pots filled with a well-draining compost mix.
12. Continue to water as above.
13. Grow on until large enough to be planted out as above. Expect plants to flower in their second or third year.
* Many plants carry Plant Breeders Rights and cannot be propagated for commercial purposes.
Common Tulbaghia Questions
· Can you cut the flowers of tulbaghia?
Yes, they boast an impressive vase life and make long-lasting cut flowers.
· Is tulbaghia hardy?
No, this is a half-hardy plant which, throughout most of the UK, will need a little help getting through winter. See ‘Cold Protection’.
· Is tulbaghia evergreen?
Some species may be semi-evergreen, though those commonly grown by UK gardeners can be expected to die back completely each winter then regrow in spring.
· Does tulbaghia spread?
In mild conditions, tulbaghia will clump up gradually via underground rhizomes. It is not considered a spreading or invasive species.
· Is tulbaghia toxic to dogs?
Like many alliums, tulbaghia can cause discomfort when ingested by pets such as cats and dogs.
